Telescope – Beginners Guide: Refractor January 1, 2010
Posted by aquillam in Astronomy, telescope beginners guide.Tags: astronomy, telescope, telescope beginners guide
add a comment

The white tube to the left and black tube near the middle are amateur refractors. Toward the right is a little orange reflector or the same diameter as the white tube telescope.
Refractors are the simplest telescopes in design. They use a large objective lens to collect the light, and an eyepiece to focus it.
There are two basic types of refractors. The usual type is a Keplerian, or some variation on it. The other type is called Galilean, because this was the design used by Galileo.
Galilean Refractors

A galilean telescope has a diverging lens for an eyepiece, so it must be placed close to the objective, before the focal point. The length of this telescope is actually the difference on the focal lengths of the two lenses, F-f.
In a Galilean refractor, the objective is usually a long focal length lens, and the eyepiece is placed closer to the objective than the focal length. The eyepiece of a galilean telescope is a diverging lens, so it takes the converging light from the objective and makes it parallel, which makes it easier for our eyes to focus.
This is the usual design for spyglasses and day-time ‘scopes because it produces an upright image. However, it is a very narrow exit pupil and poor eye relief, so your eye must be perfectly aligned to see anything. Also, it has a very small field of view. Most galilean telescopes can’t fit the entire Moon in the field of view, even at the lowest magnification.
Keplerian and other Refractors

The keplerain telescope has a diverging lens for an eyepiece. The distance between the objective and eyepiece is the sum of the focal lengths of both lenses, F+f, so it is longer than a galilean telescope.
Kepler realized if he switched the converging lens in the eyepiece to a diverging lens, he could get a wider field of view. This design also gives a wider exit pupil, so it is easier to look through the telescope. However, the image is upside down, so this makes a poor terrestrial telescope.
Problems Common to all Refractors
All refractors have a few problems in common. There are the obvious problems, such as imperfections in the glass or the shape of the lens. Large lenses can also sag under their own weight, so very large refractors are particularly hard to build. Light is also absorbed and reflected by glass (think about trying to look outside at night from a brightly lit room). Thin lenses mitigate many of these problems, but the thinner the lens, he longer the focal length, which makes for really unwieldy telescopes.
Spherical Aberration

Spherical aberration: Light coming through the edges focuses farther from the lens than the light passing closer to the center
The objective is normally a spherical lens (meaning each surface is shaped like a section of a sphere, like the overlapping area in a Venn diagram with two sets.) The focus of a spherical lens isn’t actually a point, but a line. The light passing close to the center of the lens focuses at a shorter distance than light passing farther out, so a sharp image isn’t possible.
The shorter the focal length of the lens, the worse the aberration is, so one solution is to make q very long focal length lens. Either choosing a different type of glass, or making the lens very thin will increase the focal length. Unfortunately, this will result in a very long tube. Some early refractors were so long, they took several supports, and several people to operate the telescope.
Another option is to use non-spherical or compound lenses. Non-spherical lenses are very hard to make, so they tend to be prohibitively expensive. Compound lenses are easier, and can solve the other major problem, chromatic aberration, as well.
Chromatic Aberration

Chromatic aberration: red light bends more than blue, so it focuses closer to the lens than blue light.
The shorter the wavelength (the more blue) the light is, the less it bends when it passes through a lens, so the farther away from the lens it focuses. This means if you bring the red light into perfect focus, but the green and violet light will be out of focus, and usually results in a blue or purple halo around the image.
Achromatic compound lenses were the first solution to this problem, developed in the 18th century. Each half of an achromatic lens is made of a different material. One half of the lens works best with one color, usually red, and the other half works with another color, usually blue. The two different colors then focus at the same point. Many of the great refractors of the 19th century were this design, and this is the common solution for good refractors.
Apochromatic lenses combine several lenses made of different materials designed to bring three colors, usually red, green and blue, into focus at the same point. This produces a clearer image than the achromats. Most are also designed to correct spherical aberration as well. However, the extra elements make them undesirable for large refractors. Not only are they usually heavy, but every element will absorb some of the light, making the image slightly dimmer. They are generally found in high-end amateur telescopes, especially those designed for photography. These are frequntly the favorite ‘scope for amateurs who prefer imaging solar system objects.
Telescope – Beginners Guide: Reflector vs. Refractor December 30, 2009
Posted by aquillam in Astronomy, telescope beginners guide.Tags: astronomy, telescope, telescope beginners guide
1 comment so far
There are two basic types of amateur optical telescopes, reflectors and refractors. The difference is in how they collect the light: reflectors use a mirror, and refractors use a lens.
Even if you can’t look inside to see how the light is collected, you can usually tell them apart. In refractors, the light must travel all the way through the tube, so refractors are long for their width. Since reflectors use a mirror, the light travels back and forth in the tub, so most reflectors are short for their width.
Basic Structure
Refractors

Refractors are generally long and narrow, with the wide objective at the front and small eyepiece at the back
Refractors always have a large lens at the front. You point this lens at the object you want to view, so it is called the objective lens. The light travels through the tube to the eyepiece, where you put your eye to view the object. If you look the wrong way through a refractor, you can still see the object you’re looking at, but minimized instead of magnified.
The refractor is the original and stereotypical telescope. If someone wants to include a telescope in a movie (or other popular media), it is usually a refractor. Galileo and latter Kepler used refractors. Spyglasses, prevalent in pirate movies, are refractors. However, they are usually not the best astronomical telescopes because they are limited in size and expensive to build compared to reflectors.
For more on refractors, see the entry on refractors.
Reflectors

Reflectors have a big mirror at the back, so they remain wide. The eyepiece can be located in several different places., so it is not shown here.
Issac Newton realized the limitations of refractors, and developed the first reflector. Reflectors all have a primary mirror at the bottom of the tube. However, there are many different types of reflectors with eyepieces in back, or the side, or pure imaging ‘scope with a camera mount in the middle of the tube. Some reflectors even have lenses on the front. No matter what the configuration, if you look in the wrong end you see yourself rather than the object you’re trying to look at.
Reflectors are the more common type of telescope, and all large professional telescopes are reflectors, because they are cheaper and easier to build. There are many different types, and each have their own benefits and drawbacks.
For more on reflectors, see the entry on reflectors.
Differences
Large mirrors are much lighter than large lenses, and are much easier and cheaper to make. Mirrors only require one perfect surface, they don’t need perfect glass or supports, and they don’t need to get thicker as they get larger. Lenses must be perfect all the way through and have two perfect surfaces. Wider lenses should also be thicker, or they’ll have ridiculously long focal lengths. Mirrors can be supported all across the back surface, but lenses can only be supported around the edges so large lenses may actually sag.
There are of course plenty of other differences, and each type of ‘scope has its own set of problems. See the individual pages for each ‘scope.
Telescopes – Beginners Guide – Parts common to all types of telescopes December 17, 2009
Posted by aquillam in Astronomy, telescope beginners guide.Tags: astronomy, telescope, telescope beginners guide
2 comments
There are several things the all amateur optical telescopes have in common. Below are some definitions and brief explanations.
Primary or Objective
In a refractor, the big lens at the front that you point at the object is called the objective lens. In a reflector, the big mirror that gathers all the light is called the primary mirror or the primary. Since most telescopes are reflectors, the term “primary” is sometimes used to refer to both of these, even though it is more correct to say “primary mirror or objective lens”. If you are specifically talking refractors, you should definitely say “objective”.
The primary mirror or objective lens is responsible for most of the telescope’s properties, and especially for the light gathering power and (for smaller ‘scopes) resolution.
Optical Tube Assembly
The Optical Tube assembly (OTA) is the body of the telescope. It consists of the primary or objective and the structure that supports it and makes it possible to look through.
When the telescope is a refractor, the OTA really should actually be a tube with the objective at one end and the eyepiece at the other. Reflector telescopes may have an open truss assembly instead, and the location of the eyepiece can vary significantly.
Eyepieces
The eyepiece is the lens you actually look through. Any telescope you expect to look through yourself (as opposed to attaching a camera) needs an eyepiece. There is a nice page with lots of info and images at http://www.rocketroberts.com/astro/eyepiece_basics.htm.
barrel diameter

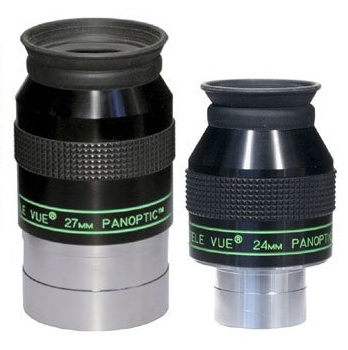
Eyepieces with a 2" and 1.25" barrel diameter. They are labeled with their focal lengths, 27mm and 24 mm. (on a side note, these are very nice eyepieces, but they also cost more than my telescope!)
Eyepieces can fit directly into the OTA, into a focuser, or into a diagonal or prism. Whatever the eyepiece fits into must match the diameter of the eyepiece. In the last 30 years or so, 1.25″ has become the standard for amateur telescopes, although large telescopes may take 2″ eyepieces. Cheap scopes may come with 0.97″ eyepieces, usually made out of plastic and apparently designed to cause eye strain and scare people away from the hobby. Earlier telescopes may have lenses made just for that telescope, so you may find eyepieces of all different sizes, especially with telescopes built before the mid-20th century.
focal length
The focal length determines the primary properties of the eyepiece (at least, when compared to eyepieces of similar configuration). Eyepieces are frequently refered to by their focal length. It determines the magnification of the telescope. It also determines what the field of view will be. The shorter the focal length, the bigger the magnification and the smaller the field of view.
In addition, shorter focal length eyepieces tend to have a smaller exit pupil. For the user, this means you have to have your eye really well aligned with the eyepiece to see anything. Additionally, less light will pass through, so the image may be dimmer.
configuration
There are many many different configurations, ranging from a single bi-convex lens to large collections of 5 (or more) lenses of various shapes with different materials in between. Many of the more complex ones are designed to make the field of view wider (usually called “wide field” eyepieces) or make the image brighter. They may also be designed to improve the eye relief. Good eye relief means you can be relatively far away and still focus on the image, very important for people who wear glasses.
One special lens is the Barlow. It is intended to be used with another eyepiece or a camera to improve magnification. A good Barlow can effectively double the usefulness of your other eyepieces.
Diagonals and prisms
Most telescopes (but especially refractors) can be hard to look through when pointing at things high overhead. A diagonal or prism redirects the light to make it easier to look through.
Diagonals work either by using a plane mirror to reflect the light at a right angle, or a prism. A prism can either reflect the light 90º or 45º.
Mirrors are generally prefered for astronomical use since they will reduce the light less (you lose a little bit of light every time the light has to pass through or reflect off a surface.) However for small telescopes a “correct image” prism may be prefered, because you can use it for terrestrial viewing as well.
Focuser
The focuser is the part that lets you bring an image into focus. There are several different types of focusers, ranging from simply moving the eyepiece by hand to motorized systems that move one of the mirrors.
Mount
You may be able to hold a small, low power telescope steady enough by hand, but chances are you will need some sort of mount for your telescope.
Small telescopes may sit very nicely on a table (especially if the alternative is a tripod bigger than the ‘scope). However, most users prefer a tripod.
There are two basic types of mounts, called equatorial and alt-az. Equatorial mounts are aligned with Earth’s axis of rotation, which makes it easy to “drive” the telescope. Alt-az mounts move in altitude (horizon to zenith) and azimuth (north, east, south…, usually measured in degrees away from due north.) This is a fairly complex subject, so it gets its own entry.
Drive or Motor
The Earth is constantly turning. If your telescope doesn’t move, the thing you are trying to look at will pass out of your ‘scopes field of view. To counter that, many scopes have a drive.
Drives work best with equatorial mounts. The Earth is rotating eastward along it’s axis. With an equatorial mount, a motor can counteract that motion by moving the telescope westward (same direction as the sky) on it’s axis at the same rate. You can also drive an alt-az mounted ‘scope, but in that case each axis has to move at a different rate and direction depending on where the ‘scope is pointed. This is only really possible if the mount is computer controlled.
Finder
Telescopes severely restrict how much you can see. With nothing in the way (like glasses) most people can see about 160º side to side. It’s pretty easy to spot the star you want that way. Most telescopes have a field of view that’s less than a degree. And if you boost the magnification, it’s even smaller. If you want to find anything with your telescope, you’ll need a finder.
There are several different types of finders. The simplest finders are just a couple of raised bumps for a sight (see image), or a hollow tube aligned with the OTA.
Most telescopes use a very small refractor, typically about 40 mm in diameter with a 5º field of view. The telescopic finders usually have mount with 3 screws to adjust the alignment with the OTA.
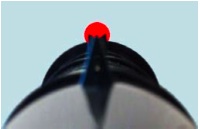
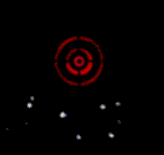
There are also more unusual finders, like red dot or telrad finders. These use a red light, usually from an LED, projected onto a screen or mirror to show where the telescope is pointed.
A more recent option is a green laser pointer mount. Green laser pointers are usually bright enough to use as a pointer at night. We can take advantage of this by putting a mount on the telescope to align the laser pointer with the OTA. Turn the laser pointer on, and you can see exactly where the telescope is pointing.


You must be logged in to post a comment.